In this article, you will learn configuring services like container, blob storage in Azure.
Azure is the most preferrable claud platform provided by Microsoft and has been used by various popular companies across the world. Azure provide many services to utilize in application like app services, storage, Cosmos DB and many more. In this article
Follow below steps to configure storage.
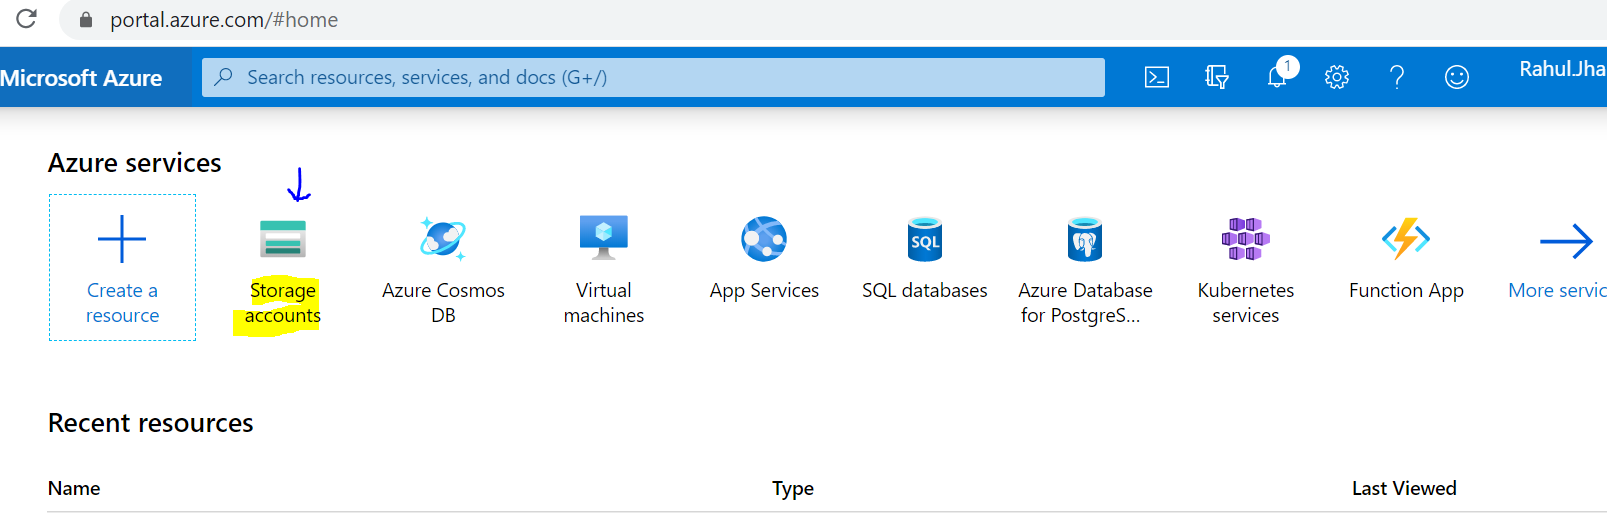
Open Azure portal and login with your subscription credential.
Now Click on Storage account icon
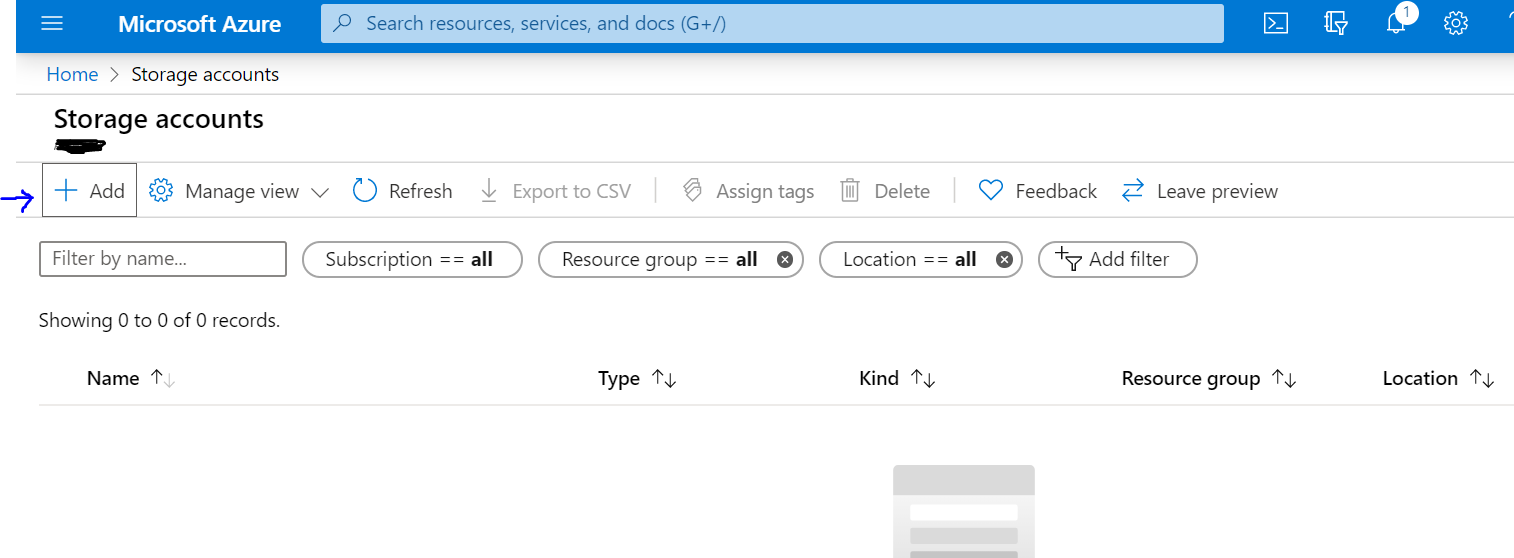
You will land to below page. Click on Add button to configure new storage account.
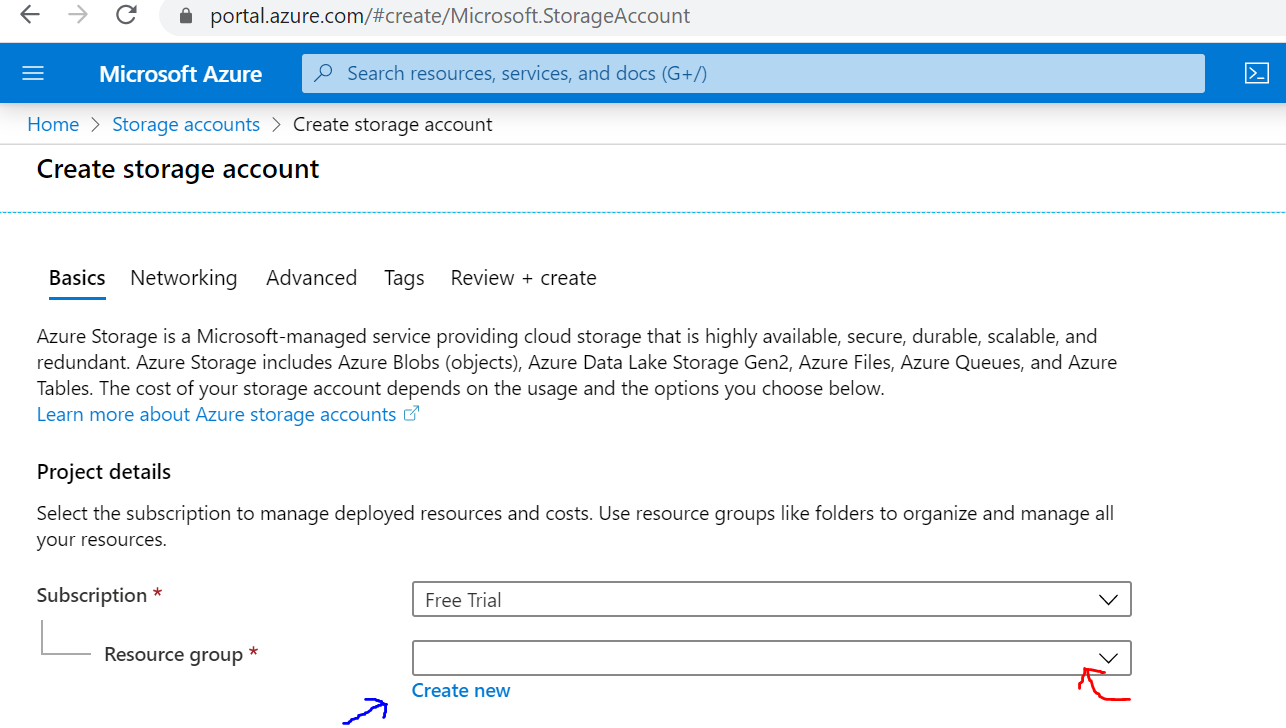
Below page opens up. Now, before we go ahead, you need to add or select a resource group. For that, either select resource group from dropdown under Subscription option or create new from “Create new” link. You can also select different subscription from subscription dropdown. I have trial subscription so it is showing here as Trial.
I am creating new resource group using “Create New” link.
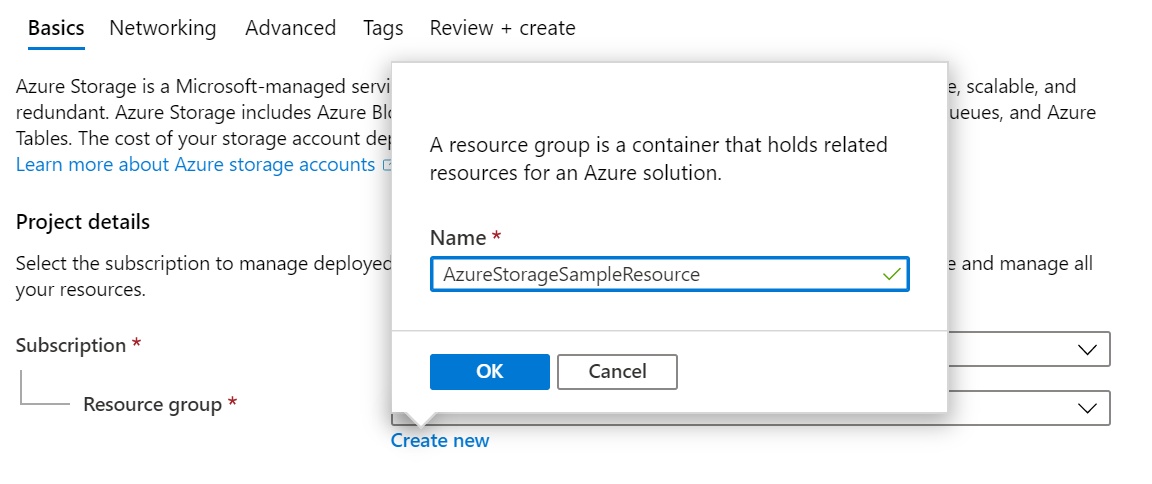
Once you create a new resource group, it will show like this in resource group dropdown.

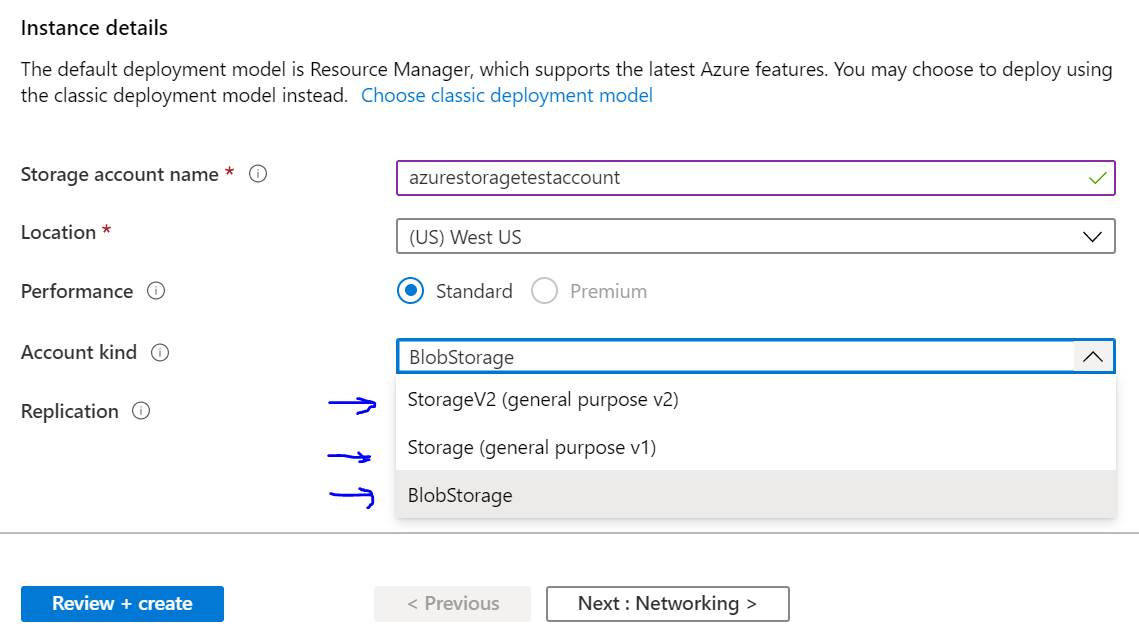
Once you have created resource group, it is time to add more details like account name and choosing storage option.
Add account name, select location, performance from given options. I am keeping them as default. When selecting account kind, you will find three options – Storage v2, Storage and BlogStorage.
General-purpose v2 storage accounts support the latest Azure Storage features and incorporate all of the functionality of general-purpose v1 and Blob storage accounts.
Read more here (https://docs.microsoft.com/en-us/azure/storage/common/storage-account-overview)
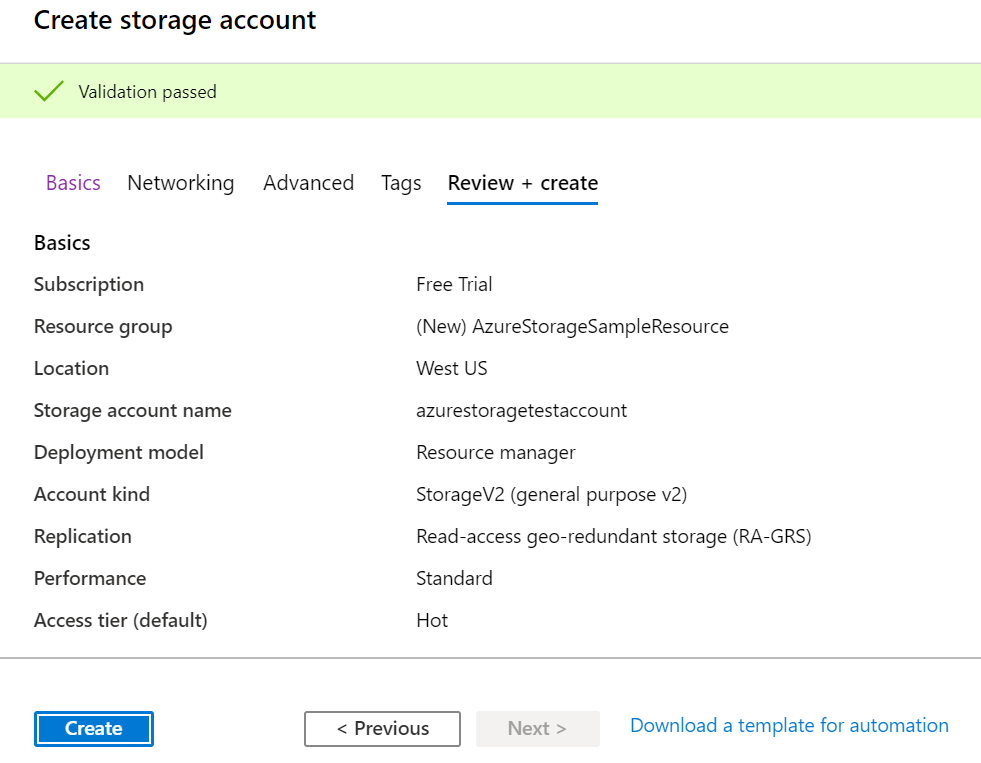
Select StorageV2 option for account kind and click on “Review + Create” button.

A final validation will run and account is ready for review and Create. You can change selected options before creating account. Leave other tabs like Networking, Advance and Tag untouched.
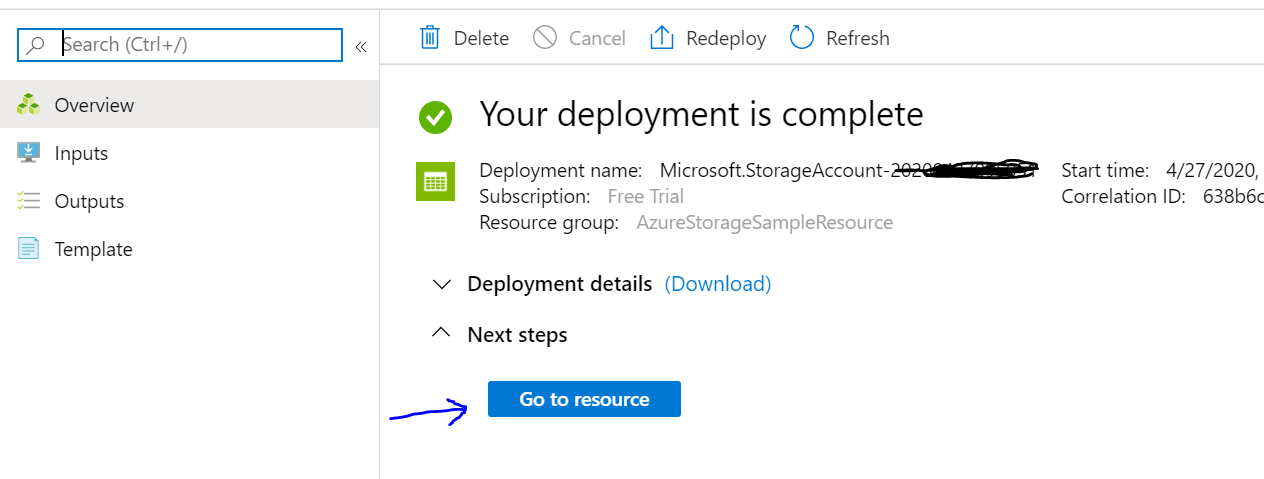
It will take few minutes to deploy and create your storage account, after which, you will see screen like this with account overview. Now click on “Go to resource” button to view the resource.
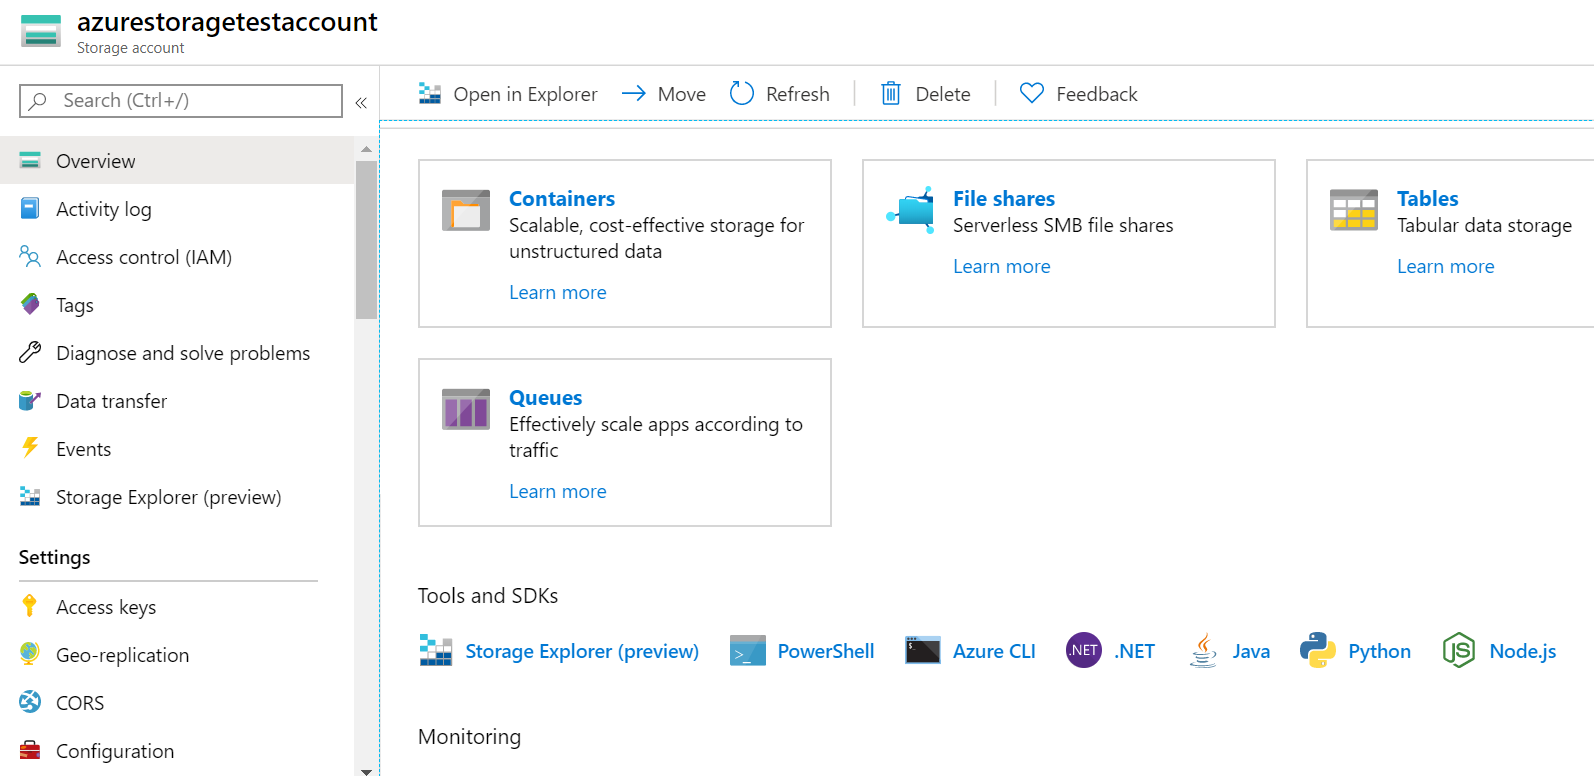
This is the landing resource dashboard; you will find several options apart from account overview like options to create container, tables, queues etc. In left side, you will find many menu options like Overview, Activity log, Access control, Tags, Diagnose and solve problems, Data transfer, Storage Explorer, Settings etc. We will see them one by one while using them.
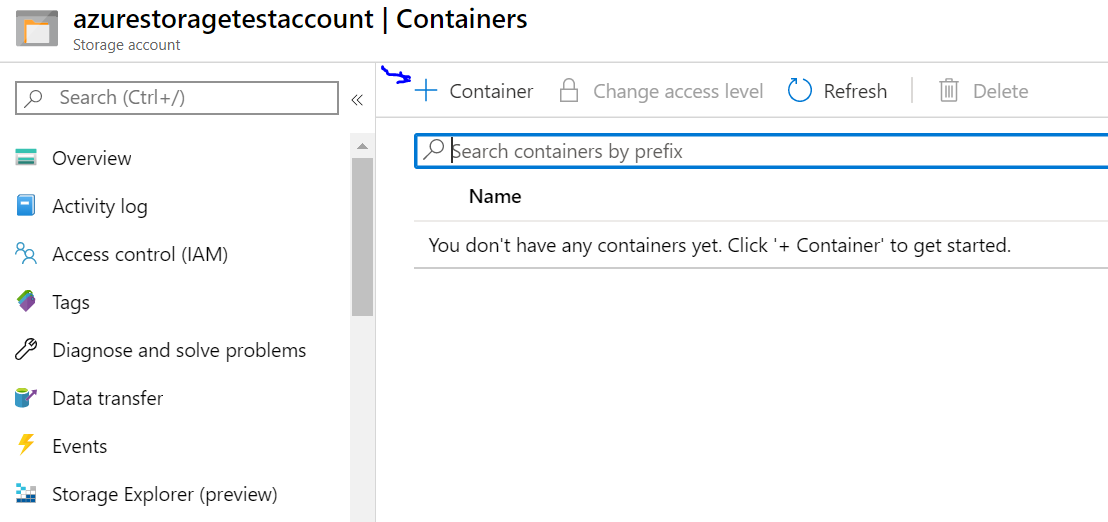
Click on Containers tile, it will open new page where you can create new container.
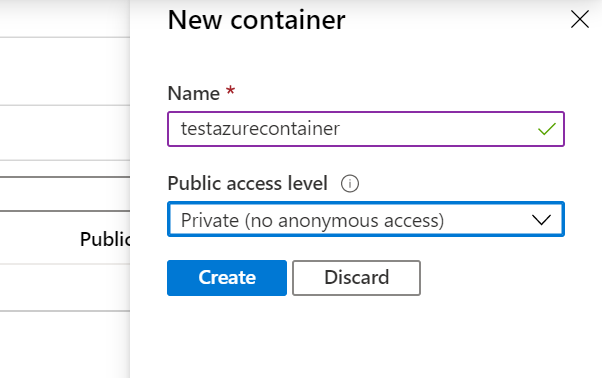
It will open a popup to create a container. Add container name and selection access level. I am using default.
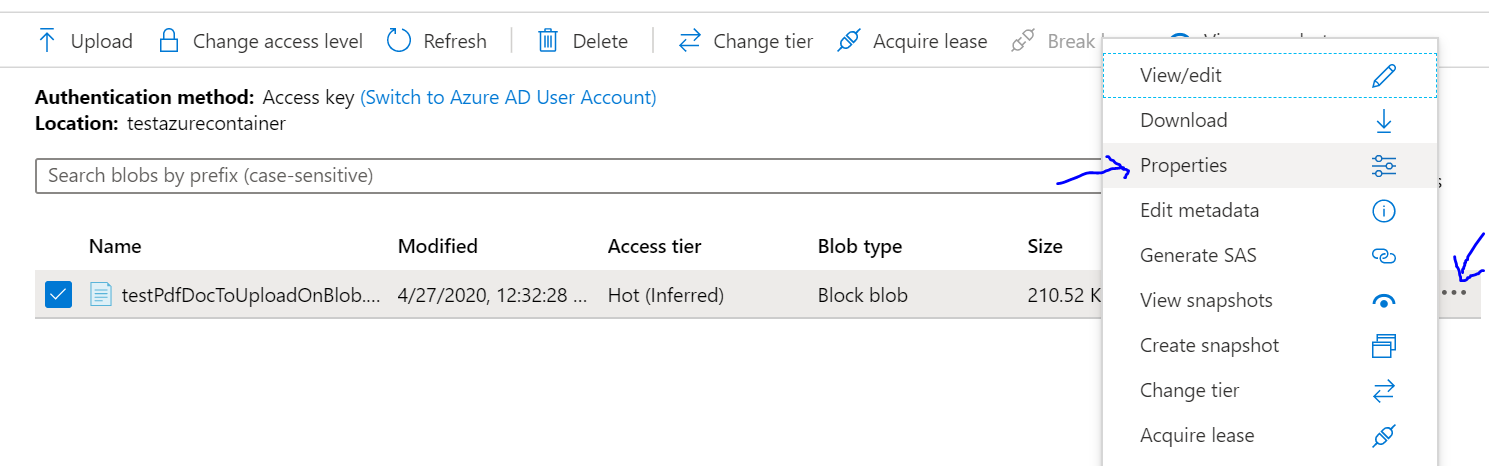
After container is created, click on the container and you will see option to upload files.
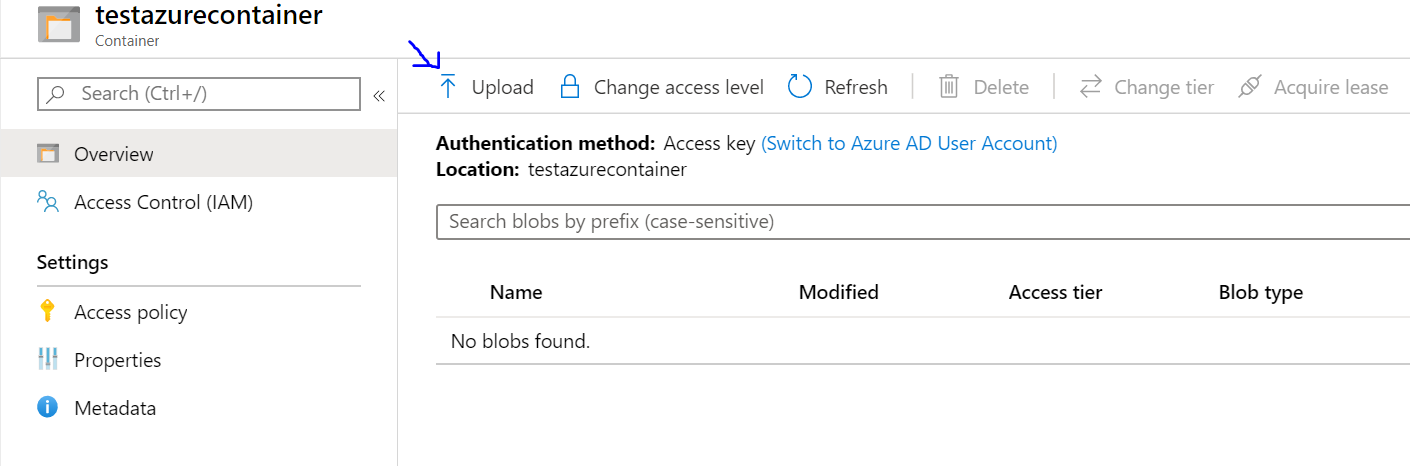
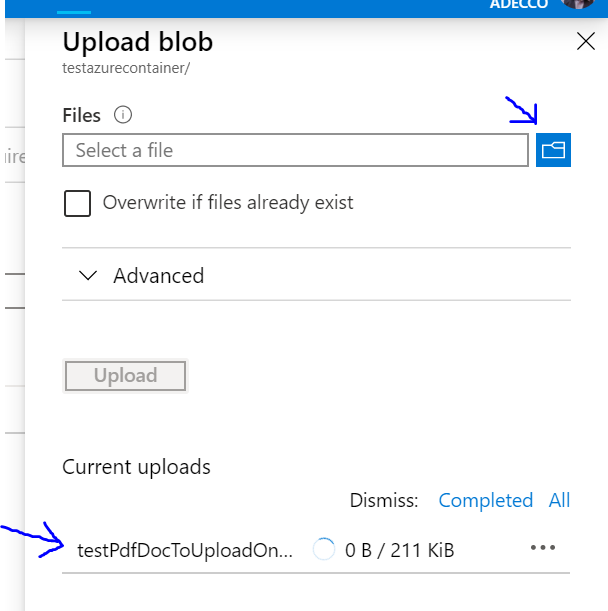
Click on “Upload” to upload blob on cloud.
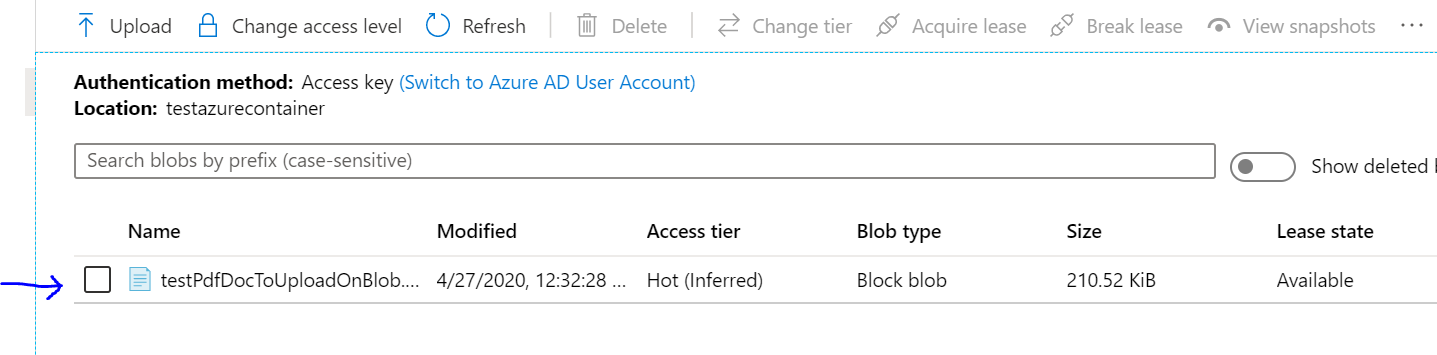
You will see list of files uploaded.
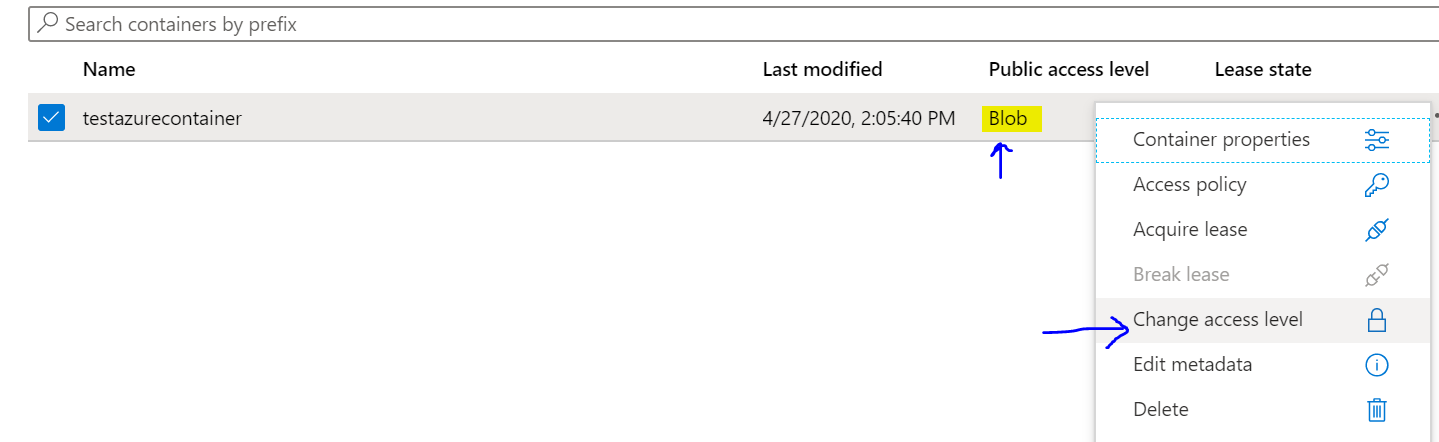
Now there is one thing. You cannot open the file from copied URL in browser due to access level. For that you have to change access level of container. Click on container and slect properties. Here you can set access level. I have set it to blob so as to access it publicly.
To access properties of this blob file, follow below screenshot.
You can copy blob URL to access it in your application or browser.
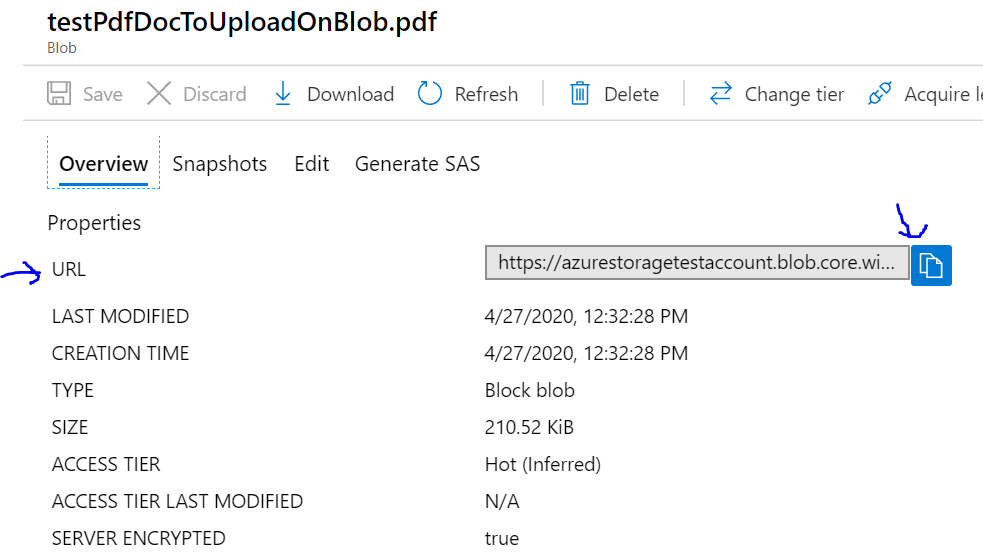
Now you can open selected link in browser and you are done.